
PunchOut Rocket Setup & Configuration Guide
Introduction
Welcome to PunchOut Rocket!
This guide provides a comprehensive walkthrough for setting up and configuring your account to enable seamless PunchOut integration between your e-commerce store and your clients’ e-procurement systems.
What is PunchOut Rocket?
PunchOut Rocket is a middleware SaaS solution that connects your e-commerce platform (WooCommerce, Magento, NopCommerce, or a custom solution) with any e-procurement system using cXML or OCI protocols (like SAP Ariba, Coupa, Jaggaer). It allows your business customers to “punch out” from their procurement system, shop on your live e-commerce site with their contract pricing, and transfer their shopping cart back into their system to create a purchase requisition—all in one fluid process.
This guide will cover:
- Account Management: Registration and managing your profile.
- E-commerce Site Configuration: Connecting your store and activating a subscription.
- End Customer Configuration: Setting up the specific PunchOut connection for each of your clients.
- E-commerce Platform Plugin Setup: Finalizing the connection on your store.
- Monitoring: Viewing communication logs.
Account Management
1.1. Registration and First Login
Your first step is to create an account on the PunchOut Rocket platform.
1. Navigate to https://platform.punchoutrocket.com.
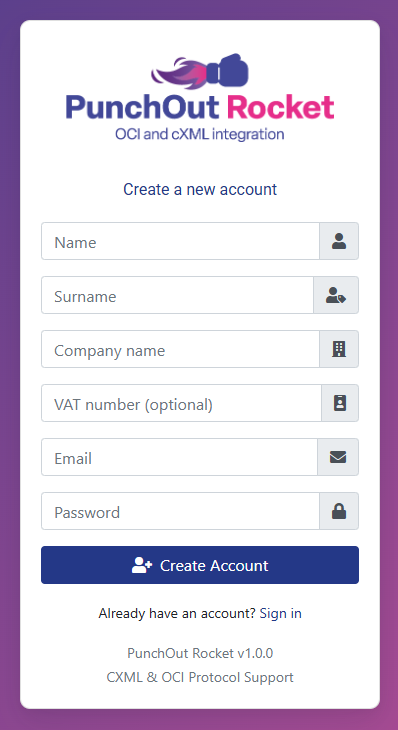
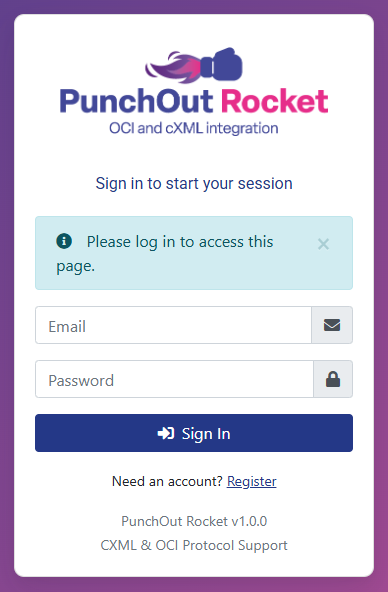
2. Click the “Register” link.
3. Fill in the registration form with your name, company details, email, and a secure password.
4. Click “Create Account”.
5. Once registered, log in with your credentials. You will be directed to the main Dashboard.
1.2. The Dashboard
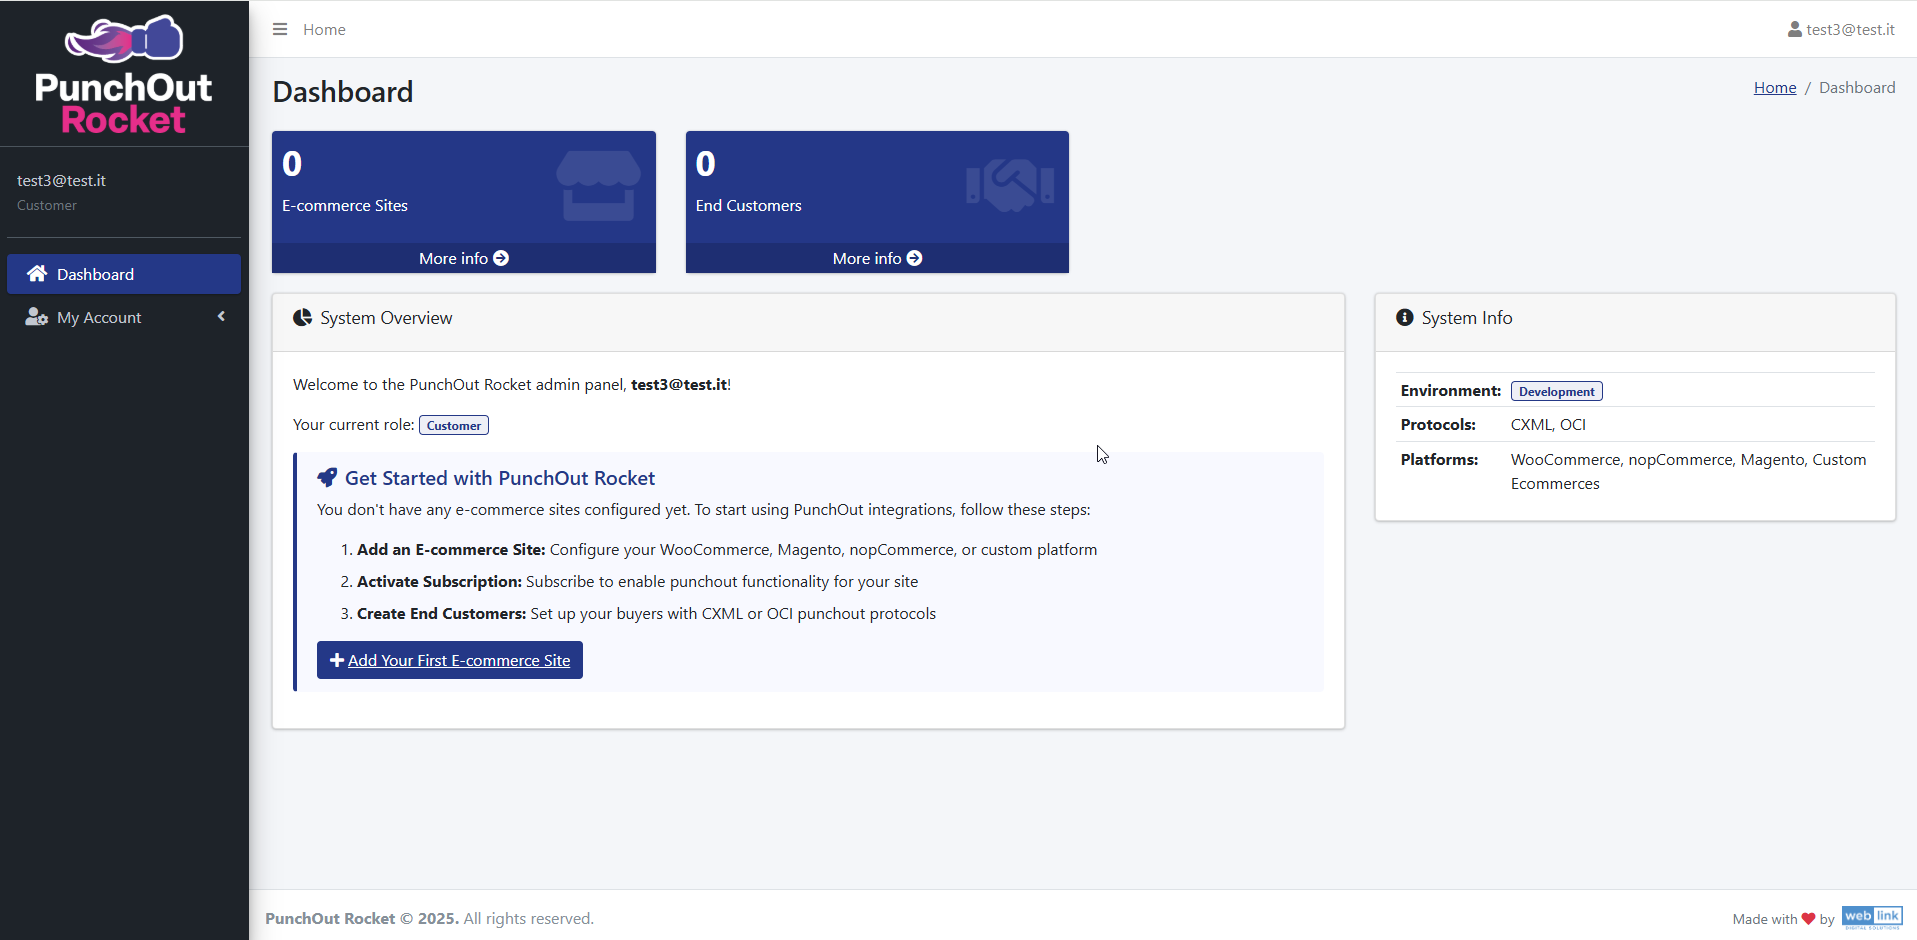
The Dashboard is your central hub. When you first log in, you will see:
Key Metrics: At the top, you’ll see counters for your configured “E-commerce Sites” and “End Customers.”
System Overview: A welcome panel that guides you through the initial setup steps.
System Info: A panel on the right summarizing the supported environments, protocols, and platforms.
1.3. Managing Your Profile
You can update your personal and company information at any time.
- Click on “My Account” in the left-hand sidebar.
- Here you can modify:
User Information: Name, Surname, and Password. Note that your email address (username) cannot be changed.
Company Information: Company Name and VAT Number. - Click “Save” to apply your changes.
E-commerce Site Configuration
This section covers linking your e-commerce store to PunchOut Rocket.
2.1. Add Your E-commerce Site
From the main dashboard’s “Get Started” panel:
- Click the “+ Add Your First E-commerce Site” button.
- On the configuration page, fill in the following details:
Site Name: A descriptive name for your store (e.g., “My Company B2B Store”). This is for your internal reference.
Site URL: The full, correct URL of your e-commerce store (e.g., “https://www.examplestore.com”).
Platform: Select your store’s platform from the dropdown menu (e.g., WooCommerce). - Click “Save“.
2.2. Activate Your Subscription
After saving, your site is created but the service is not yet active. You must activate a subscription to unlock the PunchOut functionality.
- You will be redirected to the “Edit E-commerce Site” page. The Status will show as Inactive.
- A message will indicate that you need to “Subscribe to unlock advanced configuration options.” Click the green “+ Subscribe” button.
- You will be securely redirected to our payment processor (Stripe). Enter your billing information to start your subscription.
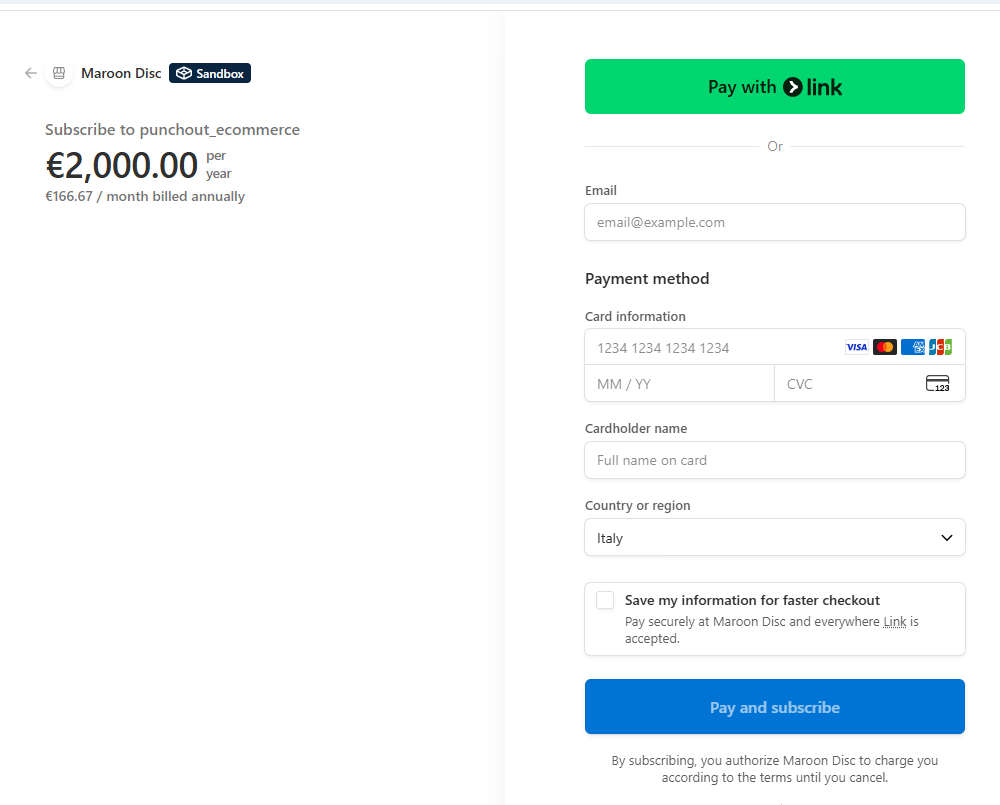
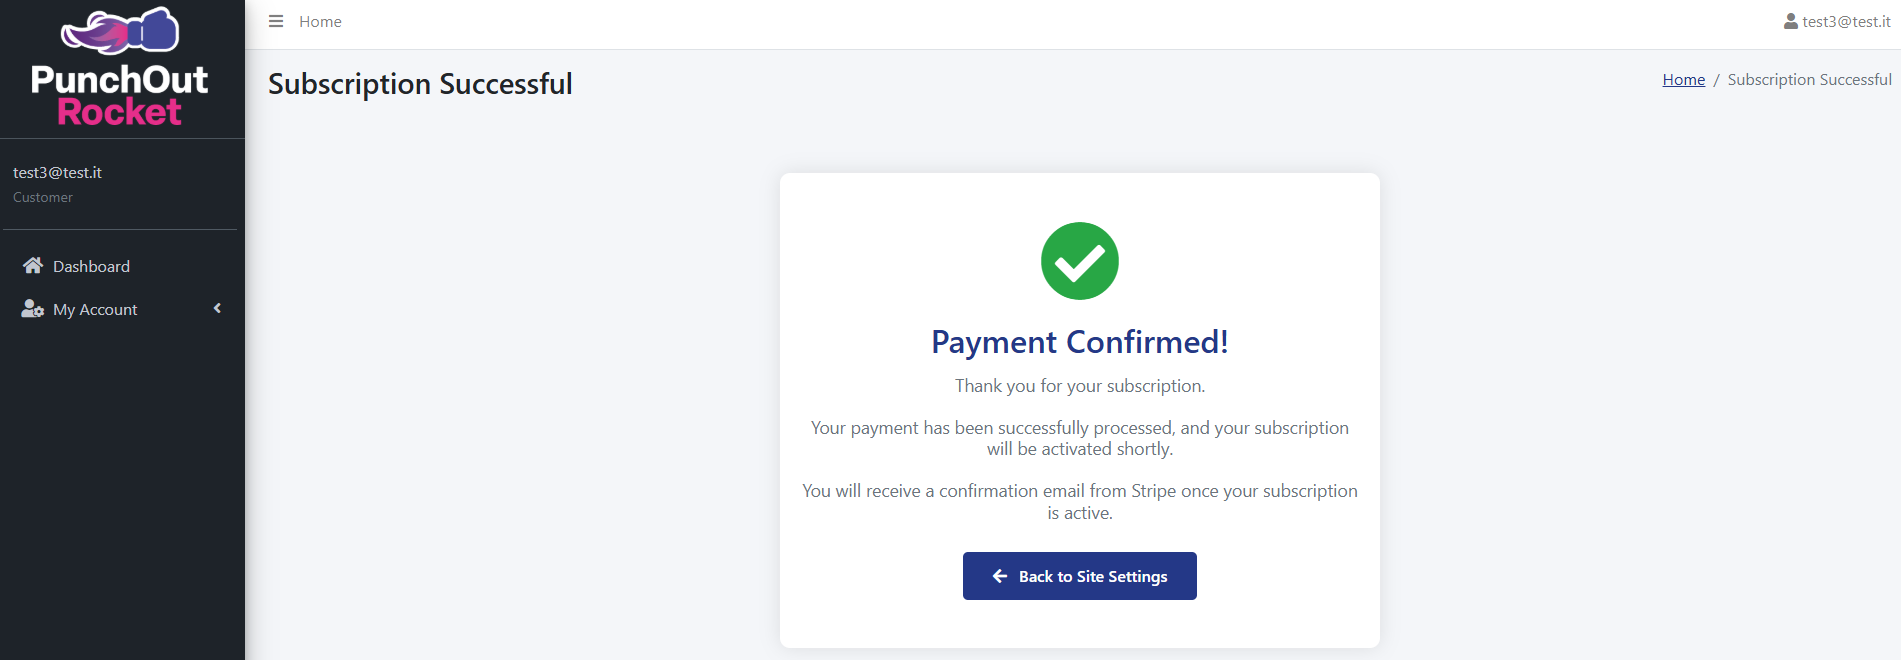
- After a successful payment, you will see a “Payment Confirmed!” message. Click the “Back to Site Settings” button to return to the PunchOut Rocket platform.
2.3. Finalize Site Configuration
Wordpress – Woocommerce
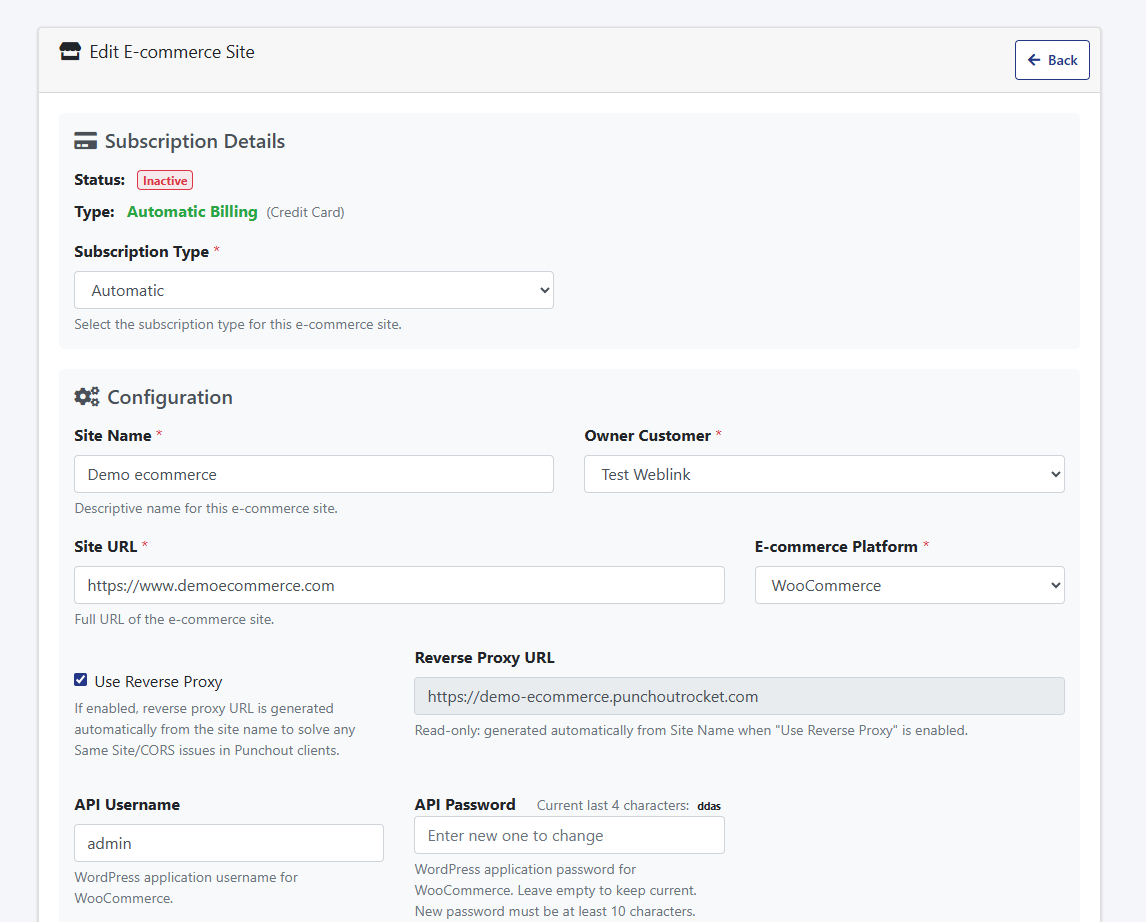
Use Reverse Proxy
When enabled, your ecommerce store is served through PunchOut Rocket’s infrastructure during PunchOut sessions. This automatically resolves the two most common browser-level failures that occur when eProcurement platforms like SAP Ariba or Coupa embed supplier stores inside an iFrame: frame-ancestors Content Security Policy blocks and SameSite cookie rejections — both of which would otherwise silently break the buyer’s session. No server-side configuration required on your end.
Learn more about iFrames, eProcurement platforms & the reverse proxy →
Reverse Proxy URL
Read-only. Generated automatically from your Site Name when “Use Reverse Proxy” is enabled. This is the URL that will be used as the PunchOut session entry point — it routes buyer traffic through PunchOut Rocket’s proxy instead of directly to your store. You do not need to set this manually.
Learn more about iFrames, eProcurement platforms & the reverse proxy →
API Username:
The API Username is the username for the WordPress application that is used for the REST API. This username is required to authenticate the API requests between your e-commerce site and the PunchOut Rocket integration. Enter the appropriate username that corresponds to the WordPress application (https://developer.wordpress.org/rest-api/reference/application-passwords/) you set up for the API access.
API Password:
The API Password is the password associated with the WordPress application (https://developer.wordpress.org/rest-api/reference/application-passwords/) used for the REST API.
- If you leave this field empty, the current password will remain unchanged.
- To update the password, enter a new password with at least 10 characters.
This password is crucial for maintaining the security of the API connection.
After saved the API Password will be encrypted for security reasons and the system will show the last 4 characters of it
- DUNS Number & ANID (Ariba Network ID):These are identifiers used in the cXML protocol, often required by procurement systems like SAP Ariba.
- DUNS Number: Your company’s Data Universal Numbering System number.
- ANID: Your Ariba Network ID.
Enter these values if your end customer requires them. They will be sent back to the customer’s procurement system with the cart data.
Magento
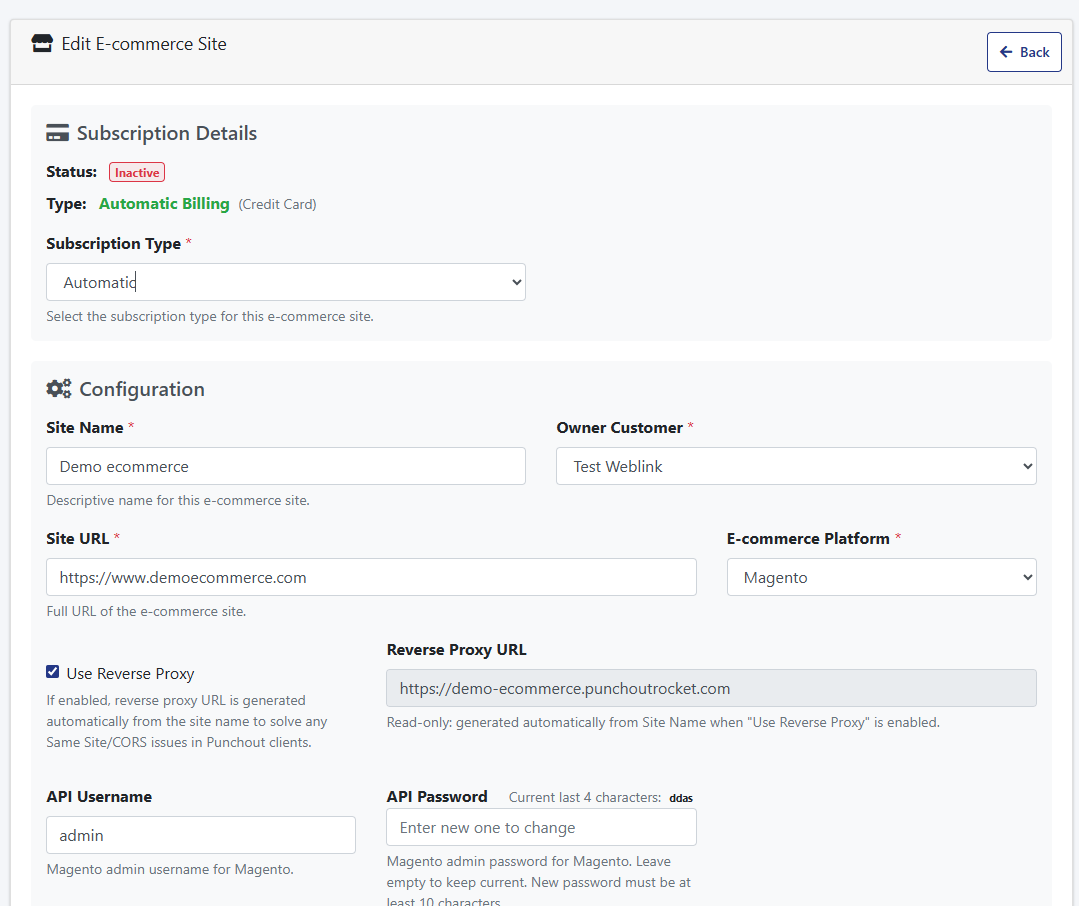
Use Reverse Proxy
When enabled, your ecommerce store is served through PunchOut Rocket’s infrastructure during PunchOut sessions. This automatically resolves the two most common browser-level failures that occur when eProcurement platforms like SAP Ariba or Coupa embed supplier stores inside an iFrame: frame-ancestors Content Security Policy blocks and SameSite cookie rejections — both of which would otherwise silently break the buyer’s session. No server-side configuration required on your end.
Learn more about iFrames, eProcurement platforms & the reverse proxy →
Reverse Proxy URL
Read-only. Generated automatically from your Site Name when “Use Reverse Proxy” is enabled. This is the URL that will be used as the PunchOut session entry point — it routes buyer traffic through PunchOut Rocket’s proxy instead of directly to your store. You do not need to set this manually.
Learn more about iFrames, eProcurement platforms & the reverse proxy →
API Username:
The API Username is the username associated with the Magento admin user used for the REST API.This username is required to authenticate the API requests between your e-commerce site and the PunchOut Rocket integration.
API Password:
The API Password is the password associated with the Magento admin user used for the REST API.
- If you leave this field empty, the current password will remain unchanged.
- To update the password, enter a new password with at least 10 characters.
This password is crucial for maintaining the security of the API connection.
After saved the API Password will be encrypted for security reasons and the system will show the last 4 characters of it
- DUNS Number & ANID (Ariba Network ID):These are identifiers used in the cXML protocol, often required by procurement systems like SAP Ariba.
- DUNS Number: Your company’s Data Universal Numbering System number.
- ANID: Your Ariba Network ID.
Enter these values if your end customer requires them. They will be sent back to the customer’s procurement system with the cart data.
NopCommerce
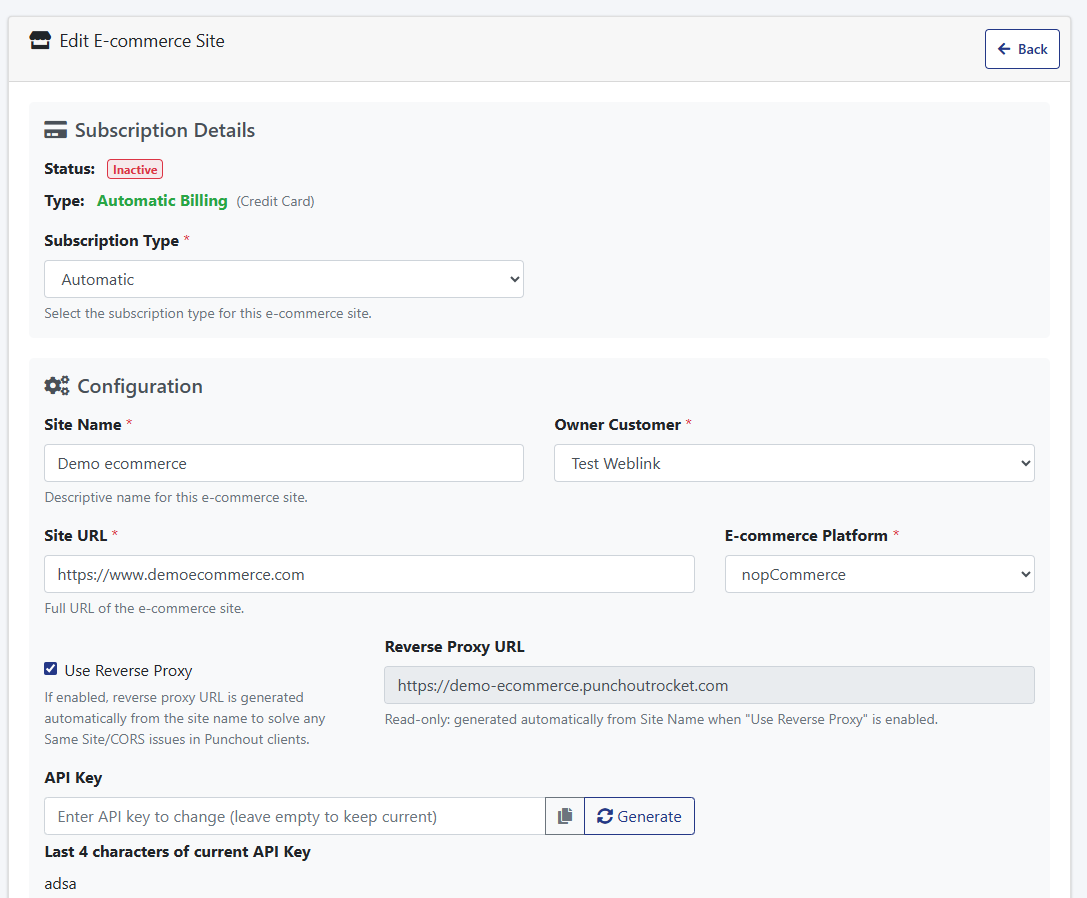
Use Reverse Proxy
When enabled, your ecommerce store is served through PunchOut Rocket’s infrastructure during PunchOut sessions. This automatically resolves the two most common browser-level failures that occur when eProcurement platforms like SAP Ariba or Coupa embed supplier stores inside an iFrame: frame-ancestors Content Security Policy blocks and SameSite cookie rejections — both of which would otherwise silently break the buyer’s session. No server-side configuration required on your end.
Learn more about iFrames, eProcurement platforms & the reverse proxy →
Reverse Proxy URL
Read-only. Generated automatically from your Site Name when “Use Reverse Proxy” is enabled. This is the URL that will be used as the PunchOut session entry point — it routes buyer traffic through PunchOut Rocket’s proxy instead of directly to your store. You do not need to set this manually.
Learn more about iFrames, eProcurement platforms & the reverse proxy →
- API Key: This is a secret key that authenticates the connection between your e-commerce site and PunchOut Rocket.
– Click the “Generate” button to create a strong, unique key.
– You will need to copy this key and paste it into the PunchOut Rocket plugin settings on your e-commerce platform.
After saved the API Key will be encrypted for security reasons and the system will show the last 4 characters of it. - DUNS Number & ANID (Ariba Network ID):These are identifiers used in the cXML protocol, often required by procurement systems like SAP Ariba.
- DUNS Number: Your company’s Data Universal Numbering System number.
- ANID: Your Ariba Network ID.
Enter these values if your end customer requires them. They will be sent back to the customer’s procurement system with the cart data.
Custom E-commerce Platform
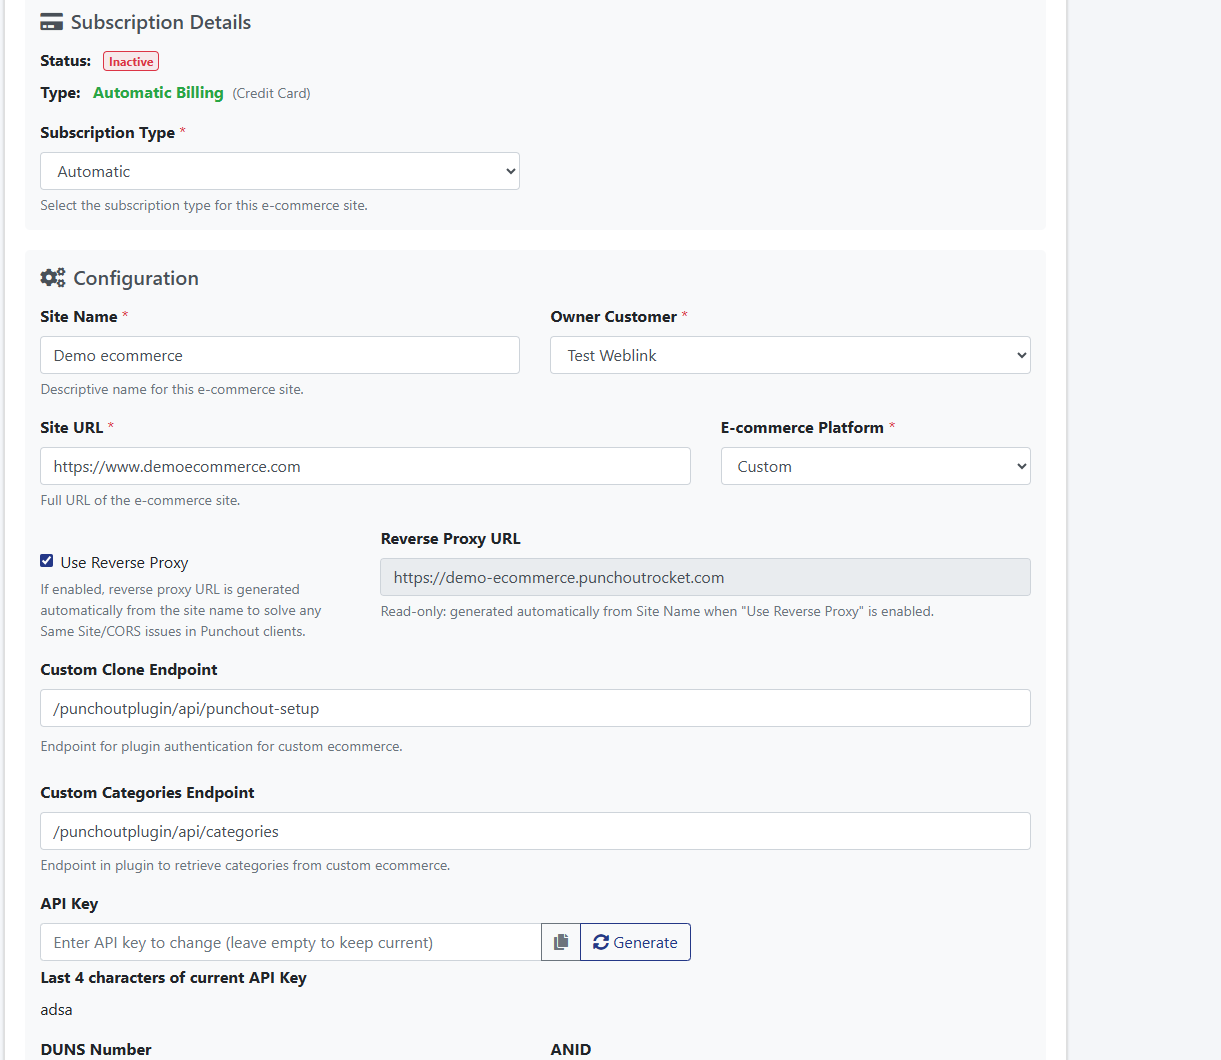
Use Reverse Proxy
When enabled, your ecommerce store is served through PunchOut Rocket’s infrastructure during PunchOut sessions. This automatically resolves the two most common browser-level failures that occur when eProcurement platforms like SAP Ariba or Coupa embed supplier stores inside an iFrame: frame-ancestors Content Security Policy blocks and SameSite cookie rejections — both of which would otherwise silently break the buyer’s session. No server-side configuration required on your end.
Learn more about iFrames, eProcurement platforms & the reverse proxy →
Reverse Proxy URL
Read-only. Generated automatically from your Site Name when “Use Reverse Proxy” is enabled. This is the URL that will be used as the PunchOut session entry point — it routes buyer traffic through PunchOut Rocket’s proxy instead of directly to your store. You do not need to set this manually.
Learn more about iFrames, eProcurement platforms & the reverse proxy →
- API Key: This is a secret key that authenticates the connection between your e-commerce site and PunchOut Rocket.
– Click the “Generate” button to create a strong, unique key.
– You will need to copy this key and paste it into the PunchOut Rocket plugin settings on your e-commerce platform.
After saved the API Key will be encrypted for security reasons and the system will show the last 4 characters of it. - DUNS Number & ANID (Ariba Network ID):These are identifiers used in the cXML protocol, often required by procurement systems like SAP Ariba.
- DUNS Number: Your company’s Data Universal Numbering System number.
- ANID: Your Ariba Network ID.
Enter these values if your end customer requires them. They will be sent back to the customer’s procurement system with the cart data.
End Customer Configuration
An “End Customer” represents one of your client companies connecting via PunchOut. Each End Customer has its own unique settings.
4.1. Create a New End Customer
- On your site’s edit page, scroll down to “Associated End Customers”.
- Click the “+ Add End Customer” button.
4.2. End Customer General Settings
- Name: A descriptive name for your client company (e.g., “Global Corp Inc.”).
- E-commerce User to Clone: This is a critical setting.
How it Works: Create a dedicated user account in your e-commerce store (e.g., a specific user role in WooCommerce). This user must have the correct permissions to see the product catalog and pricing that this specific End Customer should have access to. Enter the email address or username of that user here. During a PunchOut session for this End Customer, PunchOut Rocket will clone this user’s session, ensuring they shop with the correct entitlements. - Protocol: Choose the protocol their system uses: cXML or OCI.
- Default UNSPSC: The UN Standard Products and Services Code. This code will be used for any product that does not have a specific category mapped below.
- Default Lead Time: The estimated number of days to ship products, sent for all items in the cart.
EA Override & BX Override: Some systems require specific Units of Measure (UOM). “EA” (Each) and “BX” (Box) are common. If your client’s system requires different codes (e.g., “PCE” for “Piece”), enter the override values here.
4.3. Protocol Configuration (cXML & OCI)
Enter the credentials provided by your client’s procurement team. These must exactly match the configuration in their system.
For cXML: “FormIdentity”, “SenderIdentity”, “SharedSecret”, and the return “cXML Url”.
For OCI: The required OCI key-value parameters, including `Username` and `Password` and optional fields to be returned with the cart to your client’s procurement system.
4.4. Category Mapping
Link your store’s categories to standard UNSPSC codes.
- Click “Update from e-commerce” to fetch your category tree.
- For each category, enter when possible the corresponding UNSPSC code. This provides richer data to your client’s procurement system.
E-commerce Platform Plugin Setup
The final step is to install and configure the PunchOut Rocket plugin on your store.
- Download and install the PunchOut Rocket plugin for your platform (WooCommerce, NopCommerce, Magento or Custom is case of custom integrations).
- Navigate to the plugin’s settings page in your e-commerce admin panel.
- Copy the API Key you generated in PunchOut Rocket (Section 3.3) and paste it into the corresponding field in the plugin settings.
- Save the settings. Your store is now ready to receive PunchOut requests.


Monitoring: Communication Logs
PunchOut Rocket logs all transactions for easy troubleshooting.
- From the End Customer’s configuration page, click the “Check Logs” button.
- The log viewer shows all PunchOut requests, cart transmissions, and any errors. You can inspect the full XML/data for each transaction, making it simple to debug connection issues.
iFrames, eProcurement Platforms & the Reverse Proxy
Understanding how PunchOut Rocket handles browser security restrictions when your store runs inside a procurement portal’s embedded browser window.
Why eProcurement Platforms Use iFrames
eProcurement systems such as SAP Ariba, Coupa, Jaggaer, and similar platforms typically display the supplier’s ecommerce store embedded inside an iFrame within their own procurement portal. This lets buyers browse and add items without ever leaving their internal purchasing environment.
While convenient for buyers, this creates two well-known browser-level security errors that can silently break the shopping session on a standard ecommerce site:
frame-ancestors
The browser enforces the
Content-Security-Policy: frame-ancestors
directive. If your server does not explicitly allow the procurement platform’s domain to embed your pages, the browser will refuse to render them inside the iFrame — showing a blank frame or a security error instead.
SameSite Cookie
Modern browsers (Chrome, Edge, Firefox) block cookies that do not carry a
SameSite=None; Secure
attribute when loaded in a cross-origin iFrame. Without this, session and authentication cookies are silently dropped, causing the user to appear logged-out and breaking cart functionality entirely.
Configuring these settings correctly on every customer’s server — and keeping them compatible with all the different procurement portals — is complex, error-prone, and fragile. PunchOut Rocket solves this at the infrastructure level so you don’t have to.
How PunchOut Rocket Solves This: The Reverse Proxy
By default, PunchOut Rocket uses a reverse proxy technique to serve your ecommerce store transparently through PunchOut Rocket’s own infrastructure during a PunchOut session. Here is what happens:
SameSite policies.This approach requires zero server-side configuration changes on your ecommerce host and works out of the box regardless of the procurement platform used.
⚠️ Plugin Compatibility: Disable Optimisation Plugins
The reverse proxy works by fetching and relaying your store’s HTML in real time. Some WordPress / WooCommerce optimisation plugins process that HTML in ways that break this pipeline.
Known issue: Autoptimize (and similar minification plugins)Plugins likeAutoptimizecan inline or encode stylesheet and script content asBase64 data URIsduring HTML minification. When the reverse proxy rewrites URLs and relays this output, the Base64-encoded assets resolve against the wrong origin, causing broken styles, missing scripts, and a non-functional storefront inside the procurement iFrame.
What to do:Disable any HTML minification, CSS/JS concatenation, or asset inlining plugins (e.g. Autoptimize, WP Rocket‘s “Combine files” option, LiteSpeed Cache HTML minification) before connecting your store to PunchOut Rocket. Standard page-caching plugins that do not alter asset URLs are generally safe to leave enabled.
How to checkIf your store renders a blank page or shows broken layout inside the PunchOut session, inspect the page source delivered through PunchOut Rocket and look for data:text/css;base64, or data:application/javascript;base64, strings — a clear sign that a minification plugin is encoding assets inline. Disable the responsible plugin and re-test.
⚙️Disabling the Reverse Proxy (Advanced)
The reverse proxy is enabled by default and is the recommended configuration for all stores. However, if your infrastructure already handles cross-origin iFrame compatibility — or if you have a specific technical reason to serve your store directly — you can disable the reverse proxy in PunchOut Rocket.
If you disable the reverse proxy, you must configure your own serverWithout the proxy, your ecommerce server is directly embedded inside the procurement portal’s iFrame. You are then responsible for configuring the following headers and cookie attributes on your own web server or CDN:
• Content-Security-Policy: frame-ancestors 'self' https:// — to allow the procurement portal to embed your pages.
• Set-Cookie: … SameSite=None; Secure — on all session and authentication cookies, so the browser does not block them in a cross-origin iFrame context.
These settings vary by procurement platform and must be updated whenever a new customer uses a different portal domain. You can find the relevant options underAdvanced Settings → Server Headers & Cookie Policyin your ecommerce server or hosting control panel.
RecommendationUnless you have a specific operational reason to manage these headers yourself, keep the reverse proxy enabled. It provides the most reliable, zero-configuration iFrame compatibility across all supported eProcurement platforms.
Ready to connect your B2B store?
Start routing enterprise orders to your e-commerce today. No credit card required to set up your account.